That’s why we prepared a detailed tutorial on how you may set up two or more screens on Windows 10. Check out the article down below: Read also: Top 5 best free data recovery softwares in 2020!
Using two monitors
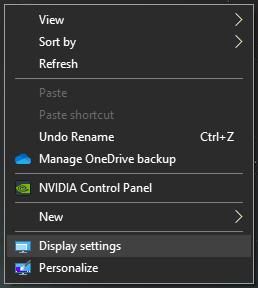
For starters, connect your second monitor to your PC or notebook. Generally, there’s an extra entrance for secondary screens, through HDMI or VGA cables. If that is not your case, you might need to buy an specific adapter for whatever you are missing. When you connect your second screen to your PC, Windows 10 will detect the second monitor and automatically extend the screen between both monitors. This means that the main monitor will be showing your desktop as normally and will be used to open most apps, but you will need to drag any open windows (which means most softwares) to your secondary screen. This allows you to watch a video in one of your screen while you talk with your friends on the other, for example. It’s important mentioning that your first monitor will always be considered the main monitor, though you may easily change that at will. All you need is to click with the right mouse button on your desktop and choose the option “Display settings”. In Windows 10, this should take you to an specific menu to customize how your monitor set up is layed out.
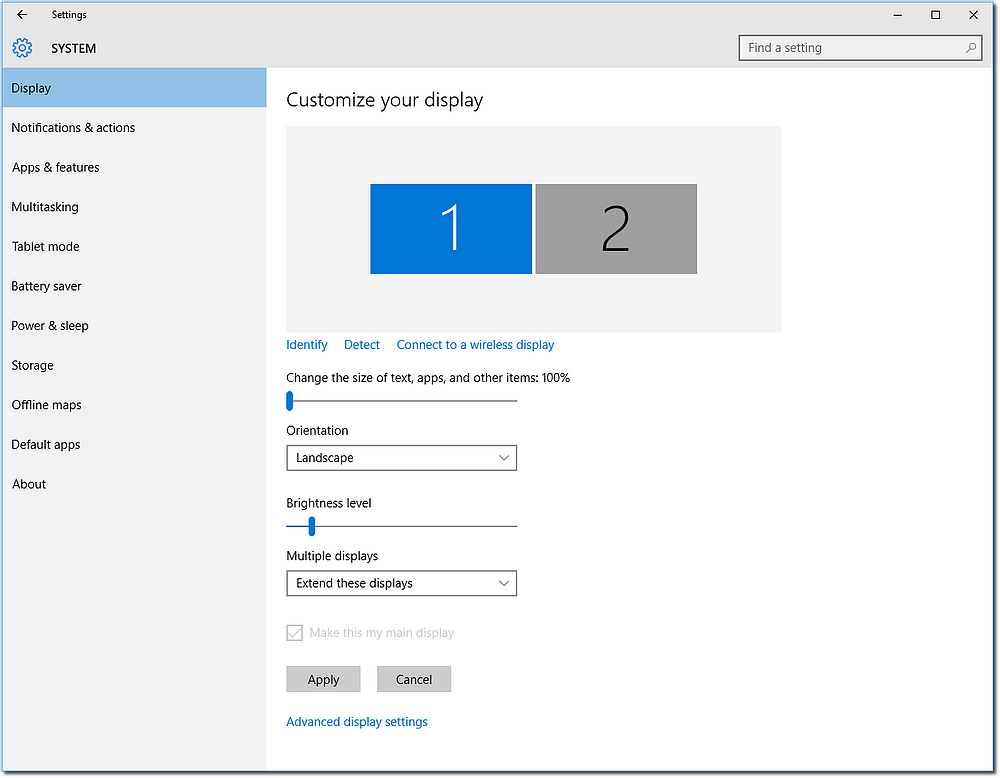
You will see two large rectangles, each simbolizing one of your monitors, marked as “1” and “2”. Rectangle 1 is the monitor that was already connected, while rectangle 2 is the last monitor your connected. Their disposition determines how they work in the extended video mode, which is how your PC figures out if your new monitor is on the right, left, above or below your main one.
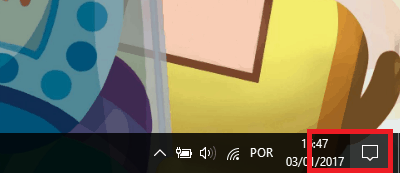
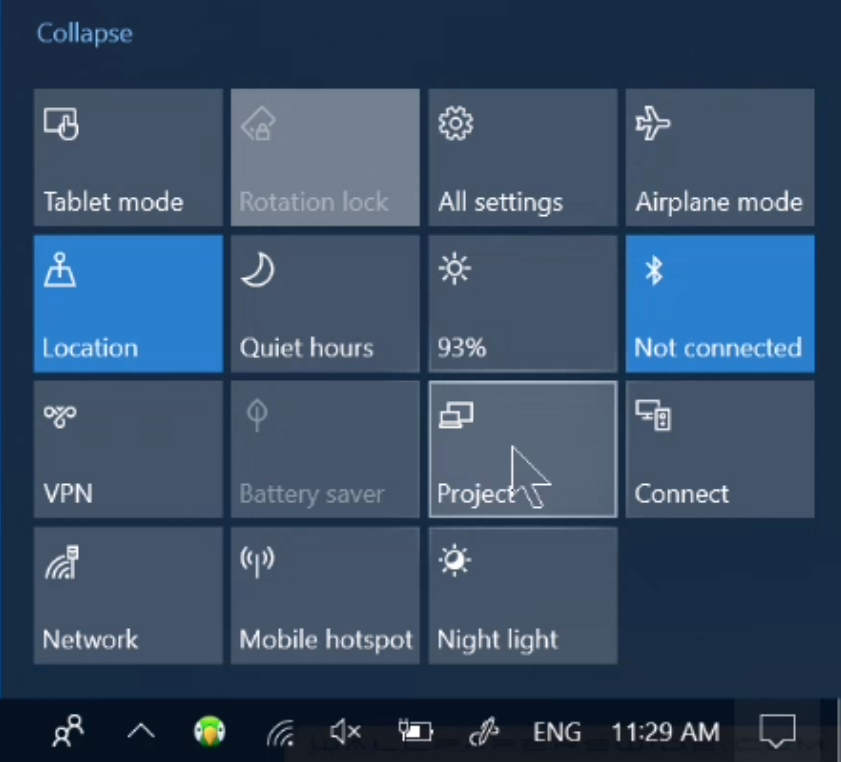
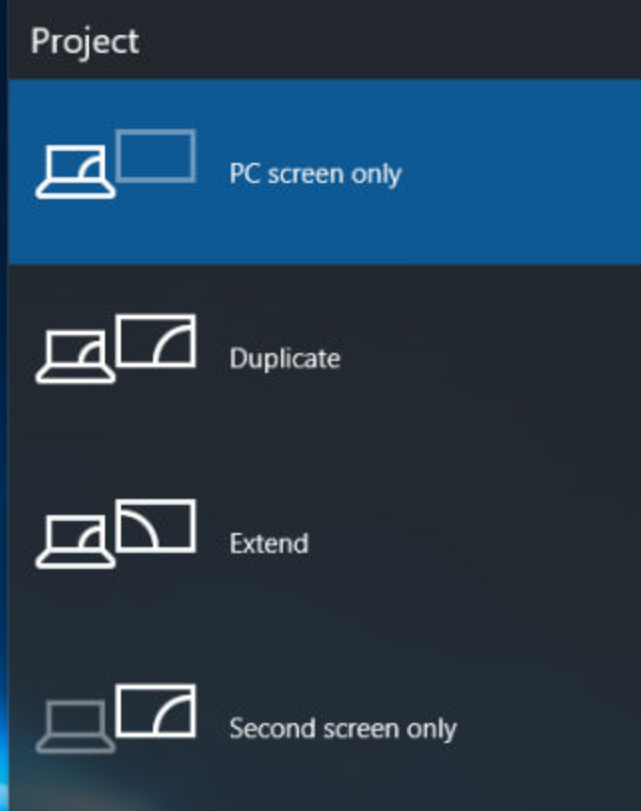
In this example, we have 1 before 2, but if your second screen is to the left of the first, it makes more sense to invert their positions. This way, all I need to do is moving the mouse to the right border of the screen to roam your other screen, or to the left to go back to your original one. The problem is that your original screen is still your main one, even if you want to use your monitors this way. To change that, I may select monitor number 2 and choose the option “Make this my main display”. Now all my apps will open on the second monitor screen, which is what I’m using as my main. If I want to use it on my other monitor, I’ll need to drag the window all the way over the border of the screen. That way, the window may show up on the screen automatically. This is how Windows 10 sets it up, you’ll need to do this every time you want to use something on your second monitor. Since nothing will open up on it by standard, it is just an extension of your desktop. It’s a good thing that it is pretty easy to drag windows and softwares, so there’s no real problems on that front. If you are looking into projecting your screen in another monitor, something pretty common for notebook users, the process is also pretty simple. For starters, click on the notification button on the bottom right side of your screen, on the windows task bar. You may also use the shortcut Win+P to access the projecting menu
You’ll see multiple options, but you should click “project”. This will open a different tab showing quick set ups for you to use with your two monitors. If you click “Second screen only”, your desktop will be projected on your second screen while the main one will remain deactivated. This is a great option for people who use notebooks to give lessons.
Another option is clicking on “duplicate” to showcase the exact same image on both monitors. There’s no practical use for that for most people, but it’s useful for college professors;
The “extend” option merely goes back to the original set up, in which both monitors are used separately for multiple tasks. If you want to stop using your second screen, all you need to do is disconnect it and your image will go back to the main screen automatically.
Don’t forget about your GPU
If your computer has a dedicated GPU, like an Nvidia or AMD, besides changing your two monitor settings on your Windows 10 panel, you may also try to check the settings of your specific graphics card to adapt it to differences in resolution, color, positioning, and other factors. In order to access the control panel in Nvidia GPUs, all you need to do is click with the right mouse button anywhere in your desktop area and click Nvidia Control Panel. If you have an AMD GPU, you may try the same procedure, but if you don’t find it, try accessing the task bar of your system and finding the Catalyst icon – the AMD GPU video manager. Read on AppTuts:
The 30 best Windows 10 wallpapers to use! The 30 best online games to play with friends on PC! 9 ways to take a screenshot in Windows 10!
So, were you able to set up your two monitors?
Were you able to learn and eventually set up your own two monitors? Don’t forget to tell us so, and leave a question down below if you still have doubts. Learn also how to convert images into PDF files on Windows 10!