Well, many people also experience this difficulty when trying to take photos at night without the use of professional cameras, but in this article we will help you with a basic guide.
Most mobile phone and smartphone sensors have trouble capturing enough light for a decent end result. Thus generating the most common problems you see in photos of the night sky, like excessive darkness, blurriness, graininess and lack of definition. And then, that beautiful image of the sky full of stars or the wonderful moon ends up looking much more like a street lamp than the moon itself. But if you check out our tips in this basic guide, you’ll definitely be able to get great results with nothing but your phone!
Getting to know your equipment
For a good photo, it is essential to understand what your equipment can offer you and know how to make the best use of some important tools. Among the main things you need to pay attention to are: So let’s take a look at the importance of each one.
1. Camera
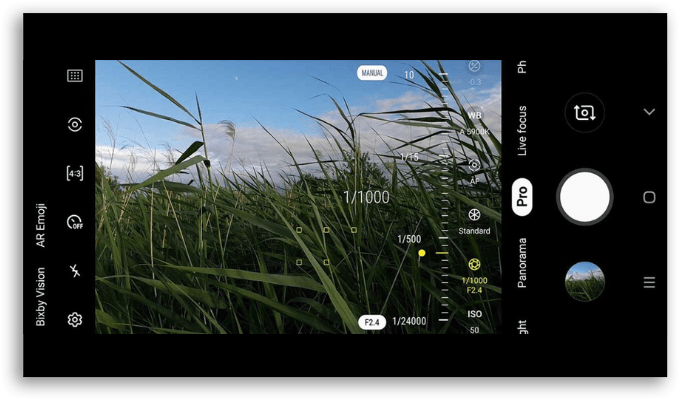
A key point when choosing your camera to take pictures of the night sky is the manual exposure mode.
Of course, a good digital SLR camera with a high ISO would be great, but some current mobile phones already have the ability to use your camera in manual exposure mode so that your photos of the night sky are noise free. Plus, you’ll have more control over important details like white balance, RAW recording, and more. The most important point here is to test! Test your camera, tweak the settings, understand what they can do for your image, and find ways to improve. If your camera doesn’t have some of these basic settings, you might want to download apps that offer some of the main ISO options. Functions such as exposure time and focus are the most important adjustments, responsible for the best image results. For example, if your device doesn’t offer a long exposure time, it will be impossible to capture the amount of light needed to take an amazing photo. We will detail this item further below.
2. Lens
Most of the time, any lens will do a good job. However, if you want to capture that image with as much of the sky as possible, fast lenses may be the best option. A wide-angle lens, ideally 24mm or above, is an excellent choice. A fast lens has a very wide aperture like f/2.8 or f/1.8, and this is great for you to shoot in low light conditions. Now if you don’t have a camera like that, don’t be discouraged. There is the possibility to adjust the zoom or even use editing software to join photos in sequence, but we will also detail these items below.
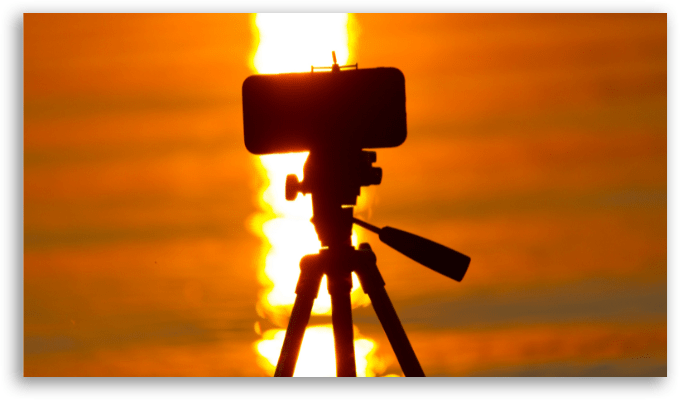
3. Tripod
You know that part of the job that you can’t escape because it’s something that seems simple, but it’s essential? Well, a tripod, in low light situations, will prevent your photo from being “blurred” or “shaky”. That’s because the camera needs to be absolutely still during the process. And it’s no use thinking about supporting your camera on a wall, stone or other item, small details like this are fundamental for beautiful photos of the night sky.
4. Shutter
Yes, the tripod is key, but a shutter trigger is also something you need to consider. No matter how light your hand is when you press the camera button, it will shake a little and can mess up the result. So a good shutter, wired or wireless, will greatly improve the experience. But in case you don’t want to invest in it, or if you’re using your phone, using the camera’s self-timer can help stabilize the camera before the shot. Now that the details regarding the equipment are a little clearer, let’s get to the tips in our basic guide on how to take the very best photos of the night sky!
Techniques for incredible photos of the nights sky
Each type of photo has a different characteristic. Taking pictures of friends, parties, outings or food requires different techniques all by themselves. However, there are some tips that will help you take pictures of the night sky. Let’s get to them.
Camera settings
As we said above, the most important point to have greater control over the settings is to use the camera’s manual mode. However, here below we give you a good base to adjust yours:
Shutter speed: 15 seconds Apertura: f/2.8 ISO: 800
However, remember to experiment. Learning to tweak the settings is very important and will bring you more freedom. It is worth mentioning that changing one of the settings usually requires you to change the other two as well.
Understanding and adjusting exposure time
Exposure time is the time the camera needs to be open to capture the necessary amount of light for the best quality of the captured image. And here comes the question, what is the ideal or necessary time? It depends on your photographic focus. Let’s take a full moon night as an example, with so much light from the celestial body itself, two seconds can be too long. However, if you want to focus on the stars, this time is very short as their brightness is lower compared to the Moon. And then you will need a longer camera exposure time. The longer the exposure time, the more light the camera sensor will absorb and the clearer the photo will be. Now did you know that most photos of the night sky end up looking brighter than they are due to an exposure time feature? You can use the exposure of several seconds – not those clicks in sequence of some cell phones – so that the camera captures more light from the stars, the sky and the horizon. Then the photos are processed in applications like Lightroom or Photoshop.
Use the HDR mode
To take night photos with your smartphone, check if your camera has HDR. If it has it, then use it! Some devices already have this feature, as usually the HDR icon is visible when opening the phone’s camera. If you can’t find it there, open the settings to activate it. HDR mode increases the camera’s sensitivity, this means capturing more light and balancing more image contrast and increasing color intensity. Remember to use a tripod and the timer so that the image is not blurred.
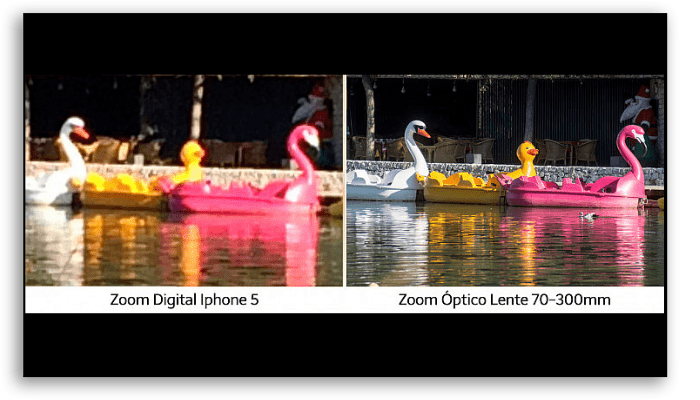
Do not use digital zoom
If you still didn’t know the difference between Digital Zoom and Optical Zoom, here’s another great tip for your photos. Most of the zoom features offered on smartphones are just a trick of digitally zooming in on the image. For this reason, most of the time, the photos become pixelated, with little sharpness and blurry.
So, if your device doesn’t have an optical zoom, avoid using digital zoom to take pictures in the dark.
Get away from light pollution
Excessive outdoor artificial light is called light pollution. In photos of the night sky, it is necessary to consider these luminous deviations and look for darker spots. The luminosity of houses, buildings and light poles can overshadow the brightness of the stars. That is, the darker it is, the better for sky photography.
Get to know the sky
If your intention is to photograph more professionally, knowing the movement of the stars will certainly help in your photographs. As the Earth rotates around the Sun, the sky changes and this knowledge will help you. There are several apps that can help you show the position of stars in real time. But, even if you’re not the biggest expert in the area and don’t want to download the apps, some simple tips can help you, like the tips in the next topic.
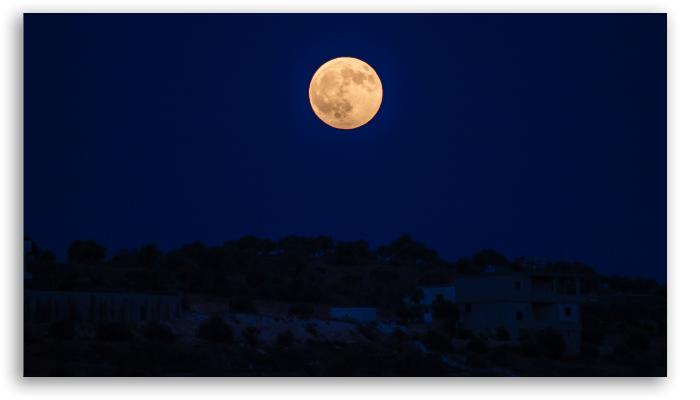
The clouds and the Moon might mess with your photos
Choosing the location and being aware of the weather in your region is also an important item. A cloud-covered night sky can ruin your plans. Another factor that should always be observed is the phase of the Moon. The Full Moon, for example, is not the best model for your photos. On the other hand, when it changes phases and its brightness decreases, the register becomes more favorable. Nights close to the new moon, when the sky is even darker, are excellent options.
Edit your photos of the night sky
As we mentioned at the beginning of the article, editing your photos is very important. After all, your device’s camera software is not always the best for taking pictures at night. Usually, the cell phone features a very basic image editing tool. However, even using your mobile phone it is possible to make some adjustments and highlight the brightness of the stars or the moon more. Controlling contrast and brightness are very important. Increasing the contrast helps to bring out the dark parts of the sky, while decreasing the exposure reduces the brightness of the illuminated surfaces in the photo. But of course your personal identity is a point to be highlighted. Use your creativity and stick to that! Some specific camera apps for shooting at night or in low light environments that we can mention are Camera FV-5 and Night Camera, available for Android, and Moonlight, available for iOS. It might also be interesting to try the Manual – RAW Camera (iOS) and Manual Camera (Google Play) that allow you to control the exposure time, ISO and exposure compensation, features similar to those existing in professional cameras, but both apps are paid, even if they are worth the small investment.
Practice makes perfect
The tips in the guide above are information to help you break through the basics of this universe. But, if you are still afraid to take pictures, remember that before running you didn’t even know how to walk. So take a chance, experiment and open your eyes. Observing the stars, the sky and the way the camera captures the lights are already worth learning. Contemplating nature, the universe around us and taking that break from the hectic modern world can change your perspectives, calm your mind and take you to a new world.
Ready to take photos of the night sky?
Practice and make the best of it! If you found this article useful, why not sharing it with that friend that loves to take photos? Go for it! Read also:
Step-by-step guide on how to recover deleted photos from SD card How to create videos with Windows 11 Photos app! cutout.pro: how to remove the background from your photos!